Red Hot Ruins
| Name | Red Hot Ruins |
| Symbol | |
| Location | |
| Number of Puzzle Rooms | 9 |
| Collectable Items | Hello Kitty Dining Table, Hello Kitty Dresser, Yummy Armchair,
Yummy Bookcase, Yummy Coffee Table, Yummy Dining Chair, Yummy Ottoman, Yummy Side Table, Yummy Lamp, Yummy Potted Plant, |

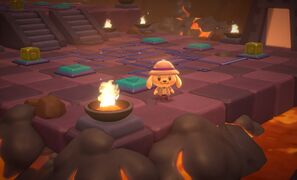
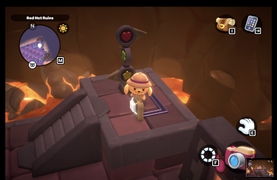
![]() Red Hot Ruins contains a collection of Puzzle Rooms, located in
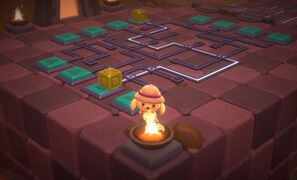
Red Hot Ruins contains a collection of Puzzle Rooms, located in ![]() Mount Hothead. In order to access Red Hot Ruins, the player must first have collected three Red
Mount Hothead. In order to access Red Hot Ruins, the player must first have collected three Red ![]() Power Crystals and reached friendship level 7 with
Power Crystals and reached friendship level 7 with ![]() Retsuko, to unlock the "Enraging Ruins" quest. Along with puzzle rooms, the Red Hot Ruins also contains parkour rooms that the player must navigate.
Retsuko, to unlock the "Enraging Ruins" quest. Along with puzzle rooms, the Red Hot Ruins also contains parkour rooms that the player must navigate.
For videos showing how to solve: visit the Discord Guide or watch "How to SOLVE the RED HOT RUINS ALL PUZZLE ROOMS" (Cozy Cove, Youtube Video) (Note: Yummy Furniture chest locations are outdated in the YT video)!
Puzzle Rooms
Puzzle Room #1
Puzzle Room #2
Puzzle Room #3
Puzzle Room #4
Puzzle Room #5
Puzzle Room #6
Puzzle Room #7
Puzzle Room #8
Puzzle Room #9


Puzzle Room #1
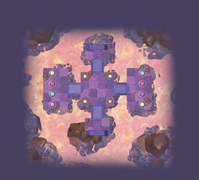
In order to unlock Puzzle Room #1, the player must make the crystal's ![]() color on each side of the room match.
color on each side of the room match.
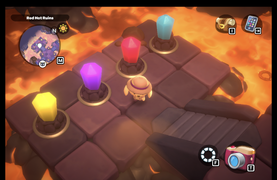
Puzzle Room #1 Solution (Left side)
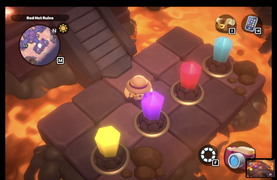
Puzzle Room #1 Solution (Right side)


Puzzle Room #2
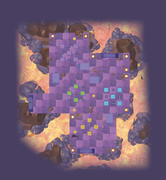
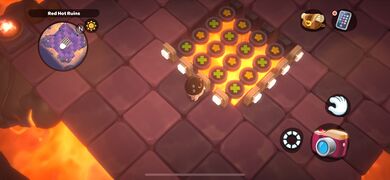
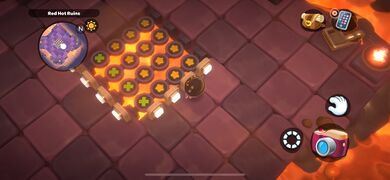
In order to unlock Puzzle Room #2, the player must place the yellow blocks on the correct button. If the correct buttons are pressed, the stairs will be activated.
Puzzle Room #2 Solution (Level 1)
Puzzle Room #2 Solution (Level 2)
Puzzle Room #2 Solution (Level 3)
Puzzle Room #2 Solution (Level 4)


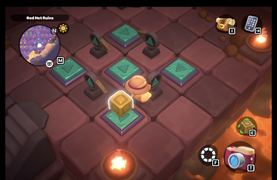
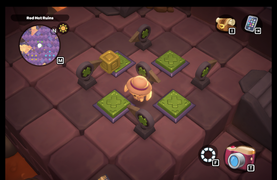
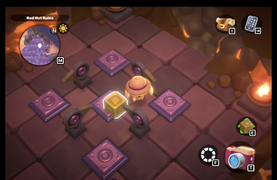
Puzzle Room #3
In order to unlock Puzzle Room #3, the player must the white buttons on the side to rotate the indicators. All indicators must have the yellow star symbol facing upwards.
- Press the 3rd button on the left side.
- Press the 3rd button on the right side.
- Press the 1st button on the right side.
See the images below for a visual guide.
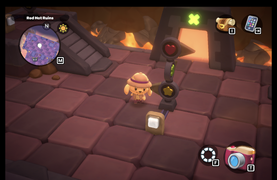
Starting point for Puzzle Room #3
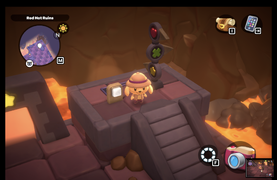
Press the 3rd button on the left side. This is what the indicators should look like.
Press the 3rd button on the right side. This is what the indicators should look like.
Press the 1st button on the right side. This is what the indicators should look like.


Puzzle Room #4
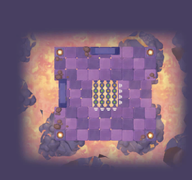
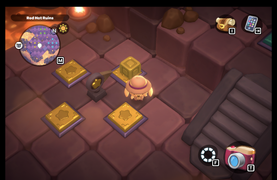
In order to unlock Puzzle Room #4, the player must walk the correct path upon the buttons on the ground.
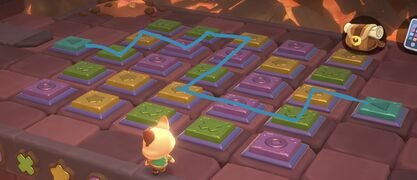
Puzzle Room #4 Solution

Puzzle Room #5
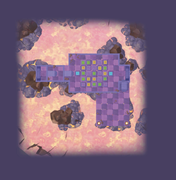
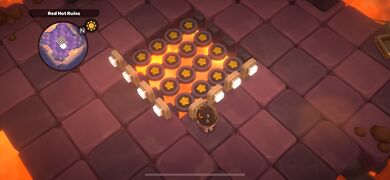
In order to unlock Puzzle Room #5, the player must place the yellow blocks on the correct buttons. If the correct buttons are pressed, a path between the two buttons will glow and the stairs will be activated.
Puzzle Room #5 Solution (Level 1)

Puzzle Room #5 Solution (Level 2)
Puzzle Room #5 Solution (Level 3)


Puzzle Room #6
In order to unlock Puzzle Room #6, the arrows on the three points must be facing the correct way. The player can change the direction of the arrow points by pressing the white button nearby. The arrow indicators must point towards the door that has the same indicator.
Puzzle Room #6 Solution (Middle)
Puzzle Room #6 Solution (Left)
Puzzle Room #6 Solution (Right)


Puzzle Room #7
In order to unlock Puzzle Room #7, the player must press the white buttons under each indicator so that the purple icon on the indicator faces towards the center.
Puzzle Room #7 Solution

Puzzle Room #8
In order to unlock Puzzle Room #8, the player must enter through the yellow star entrance (Room #3) and press the white button to open the red heart door. The player can use the crystal's ![]() to navigate the room by changing their color.
to navigate the room by changing their color.
Entering from the yellow star entrance:
- Turn crystal #1 red.
- Turn crystal #2 blue.
- Turn crystal #3 orange.
- Turn crystal #4 orange.
- Turn crystal #5 red.
- Press the white button.
- Turn crystal #5 orange.
- Turn crystal #6 orange.
Entering from the red heart entrance:
- Turn crystal #6 orange.
- Turn crystal #5 orange.
- Turn crystal #4 orange.
- Turn crystal #3 blue.
- Turn crystal #2 red.
- Turn crystal #1 red.
To access the ![]() Treasure Chest, turn crystal #3 blue.
Treasure Chest, turn crystal #3 blue.
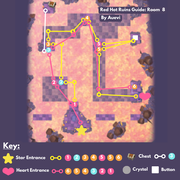
Visual Guide to Puzzle Room #8

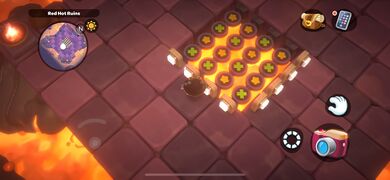
Puzzle Room #9
In order to unlock Puzzle Room #9, the player must first press the white button in the center of the room. The cutscene will then showcase the sequence in which the buttons must be pressed. The sequence goes: red heart, blue triangle, green 'x', and yellow star.
Puzzle Room #9 Solution
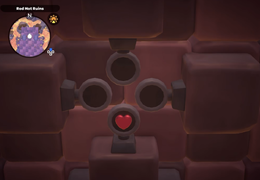
- 1 in button sequence
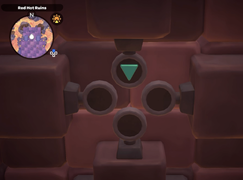
- 2 in button sequence
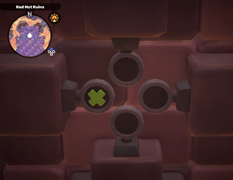
- 3 in button sequence
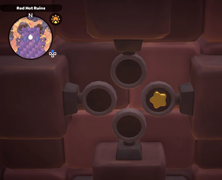
- 4 in button sequence


